What does it mean to format a book?
Key takeaway: Book formatting is the layout work that turns a manuscript into a clean print or ebook file.
Book formatting is the layout of a manuscript into a finished interior. It sets the page size, margins, fonts, chapter starts, page numbers and front and back matter. Formatting makes a book readable and meets the technical rules of a platform such as Amazon KDP.
Formatting is not the same as editing. Editing fixes words. Formatting shapes the page. Do your editing first, because changes after formatting can shift every page.
Print and ebook formatting also differ. A print interior has a fixed page size and fixed page breaks. An ebook reflows to fit the reader's screen. This guide covers the print interior in Word. If you want a reflowable ebook layout, a template can help.
Amazon KDP is Amazon's self-publishing service for ebooks and paperbacks. It accepts a Word file or a PDF for a paperback interior. A PDF is the safer choice, because it locks the layout. Word can shift text when a different computer opens the file.
You can also hire help. A formatting service sets up the file for you. If you prefer to do it yourself, Word is enough for most plain-text books.
Other tools exist, such as Kindle Create, Atticus and Vellum. Many authors already own Word, and it is flexible, so it is a good place to start.
Set the trim size and margins
Key takeaway: Pick the trim size first. Then set margins that match your page count.
The trim size is the final page size of the printed book. Common choices include 5.5 x 8.5 inches and 6 x 9 inches. KDP calls a book large if it is wider than 6.12 inches or taller than 9 inches. Large books cost more to print.
In Word, set the size like this:
- Open the Layout tab.
- Choose Size, then More Paper Sizes.
- Enter the width and height of your trim size.
Next set the margins. A margin is the blank space between the text and the page edge. KDP asks for a larger inside margin as the page count grows, because more pages curve into the spine.
| Page count | Inside margin | Outside margin |
|---|---|---|
| 24 to 150 | 0.375 inches | 0.25 inches min |
| Over 700 | 0.875 inches | 0.25 inches min |
| Pages with bleed | Follow the tier | 0.375 inches min |
Between 150 and 700 pages, the inside margin steps up in tiers. Check the exact values on the KDP page before you set yours.
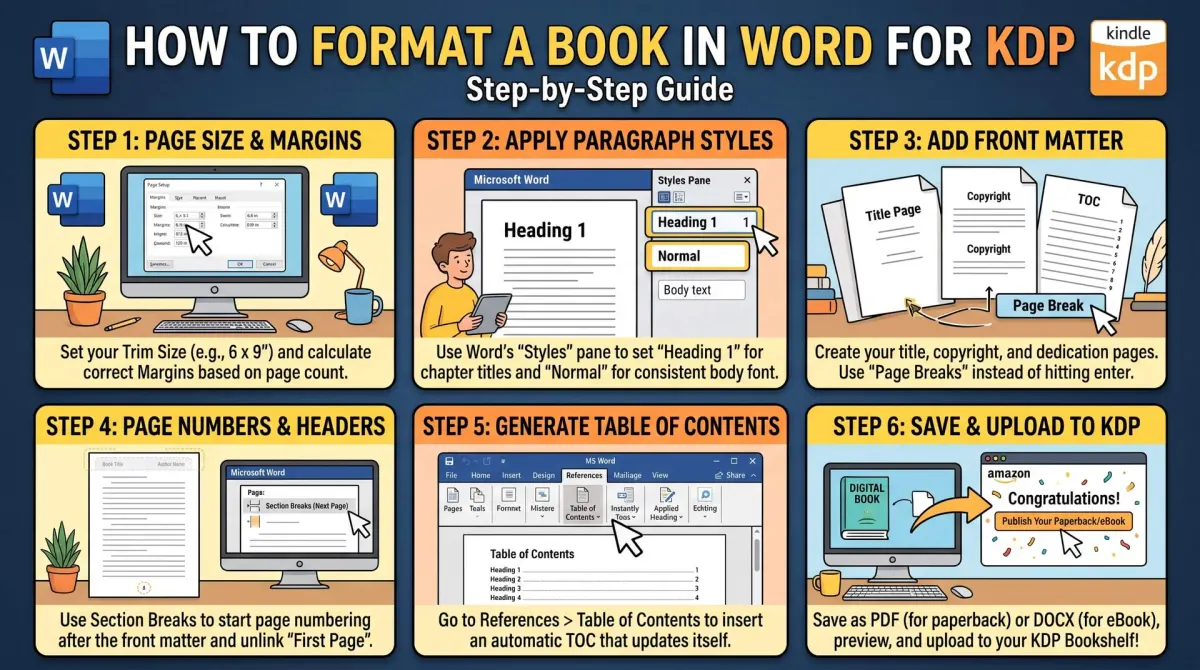
In Word, open Layout, then Margins, then Custom Margins. Set Multiple pages to Mirror margins. This makes Word use "Inside" and "Outside" in place of left and right. Enter your inside and outside values. Set top and bottom to at least 0.25 inches.
Here is a worked example for a 6 x 9 inch book with 150 pages.
- Page width: 6 inches
- Inside margin: 0.375 inches
- Outside margin: 0.5 inches (above the 0.25 minimum)
- Text width: 6 − 0.375 − 0.5 = 5.125 inches
The text block is 5.125 inches wide. A line of 11 point type fits about 11 to 13 words, depending on the font. Wider margins give a calmer page. Narrower margins fit more text per page.
KDP's margin guide has the full details, and our own post walks through the numbers.
How to format a book in Word: steps
Key takeaway: Work in order. Set the page, build styles, add content, then add numbers.
Use these steps on a finished, edited manuscript.
- Save a copy of your manuscript.
- Set trim size and mirrored margins.
- Create styles for body, chapter titles and subheads.
- Apply the styles to all text.
- Insert section breaks between front matter and chapters.
- Add page numbers to the main text.
- Save as a PDF and check it.
Take each step slowly. The first one is easy to skip. A copy protects you if a formatting step goes wrong.
Step three is the heart of the method. Word styles let you set a look once and apply it many times. Use these three at least:
- Normal or Body Text. Set the font, size, line spacing and first-line indent.
- Heading 1. Use it for chapter titles. Set the size, spacing and page break before.
- Heading 2. Use it for subheads inside a chapter.
A common body setup is a serif font such as Garamond or Georgia. Use 11 to 12 point with line spacing near 1.15 to 1.3. A first-line indent of 0.25 to 0.3 inches replaces a blank line between paragraphs. Do not use the Tab key or spaces to indent.
For chapter starts, set Heading 1 to start on a new page. Add extra space above the title so it sits about a third of the way down the page. This gives a classic look.
Do not type blank lines to make space. Use paragraph spacing in the style. Do not type page breaks by hand between every chapter. Use the style option "Page break before."
Front matter, section breaks and page numbers
Key takeaway: Section breaks let front matter and the main text use different page numbers.
A print book has front matter before chapter one. KDP's suggested order for front matter is:
- Half title page
- Title page
- Copyright page
- Reviews or praise
- Dedication
- Table of contents
- Preface
- Acknowledgments
- Prologue
- Introduction
Most books use only some of these. KDP says many elements are optional. Keep what your book needs.
For the copyright page, KDP says it goes on the first left-facing page after the title page. It has no page numbers or headers. A template can help you fill it in.
Word handles this with section breaks. A section break splits the document into parts. Each part can have its own page numbers and headers.
To add one, go to the Layout tab. Choose Breaks, then Next Page under Section Breaks. Place one after the front matter and one before chapter one.
Then set page numbers:
- Click in the first page of the main text.
- Open Insert, then Page Number, then Format Page Numbers.
- Choose Start at 1.
- Turn off "Link to Previous" in the header or footer.
Front matter often has no numbers, or it uses small Roman numerals. The main text starts at 1.
Page numbers should sit in the footer, centered or at the outside edge. Keep them clear of the margin limit. Chapter first pages often hide the number. Use "Different First Page" for that.
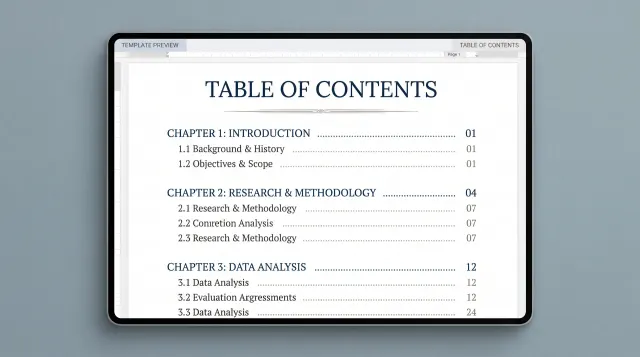
For the table of contents, Word builds it from your Heading styles. Insert it from the References tab. Update it after any change. KDP says entries must match the chapter names in the body.
Check the file before you upload
Key takeaway: Save as PDF, then check the page size, page count and margins before you upload.
Most pages stop at saving the file. A check will catch issues early.
Save the file as a PDF from Word. Choose File, then Save As, then PDF. Use "Standard" quality for print. Make sure fonts are embedded. Word does this by default for most fonts.
Then check these items:
- Page size. It must match your trim size exactly.
- Page count. It must match the number you will enter on KDP.
- Margins. Text must sit inside the margin limits.
- Fonts. All fonts must look the same on screen as in Word.
- Blank pages. Remove stray blanks.
- Widows and orphans. Fix single lines left alone at the top or bottom of a page.
You can test the PDF in a free browser tool. It checks page size, page count and bleed on your own device, and does not upload your file.
Then order a printed proof copy from KDP. A proof shows how the margins feel in hand. It also shows spine curve, ink and paper. Fix all problems on the proof before you publish.
Common Word formatting problems and fixes
Key takeaway: Most problems come from manual spacing. Fix them with styles.
Watch for these common problems.
- Text jumps between pages. Cause: manual page breaks. Fix: use "Page break before" in the style.
- Uneven indents. Cause: tabs or spaces. Fix: use a first-line indent in the style.
- Wrong margins on odd pages. Cause: mirror margins not set. Fix: set Multiple pages to Mirror margins.
- Page numbers on front matter. Cause: no section break. Fix: add a section break and unlink the footer.
- Fonts change. Cause: missing font on another computer. Fix: save as PDF.
- Long blank gaps. Cause: extra paragraph returns. Fix: delete them and use spacing.
If your file is a mess, use "Show/Hide" (the paragraph mark button). It reveals hidden returns, tabs and spaces. Clean those first.
A related task is checking how many pages your book will have. A rough guide helps you plan.
People Also Ask
What size should a book be in Word?
Set the page size to your trim size. Common choices are 5.5 x 8.5 inches and 6 x 9 inches. KDP calls a book large if it is wider than 6.12 inches or taller than 9 inches. Large books cost more to print, so choose before you format.
What font should I use for a book?
A serif font such as Garamond, Georgia or Palatino suits most print books. Use 11 to 12 point for body text. Pick a font you have the right to use and that embeds into a PDF. Keep one body font and one heading font for a clean look.
Can I upload a Word file to KDP?
Yes. KDP accepts a Word file for paperback interiors, but a PDF is safer. Word can shift text if fonts or settings differ on another computer. A PDF locks the layout. Always preview the file in KDP's previewer before you publish.
Common mistakes
- Setting margins that ignore the page count.
- Indenting with the Tab key or spaces.
- Using hard page breaks between chapters.
- Putting page numbers on the title and copyright pages.
- Skipping the printed proof.
Your next step: format one chapter first
Format a single chapter with styles, margins and page numbers. Save it as a PDF and run it through the checker. If it passes, apply the same styles to the whole book.
When the file is ready, check the whole book against a full pre-publish list.